METAL STRUCTURE ASSEMBLY
Steel Structure Assembly Using the StarModul System
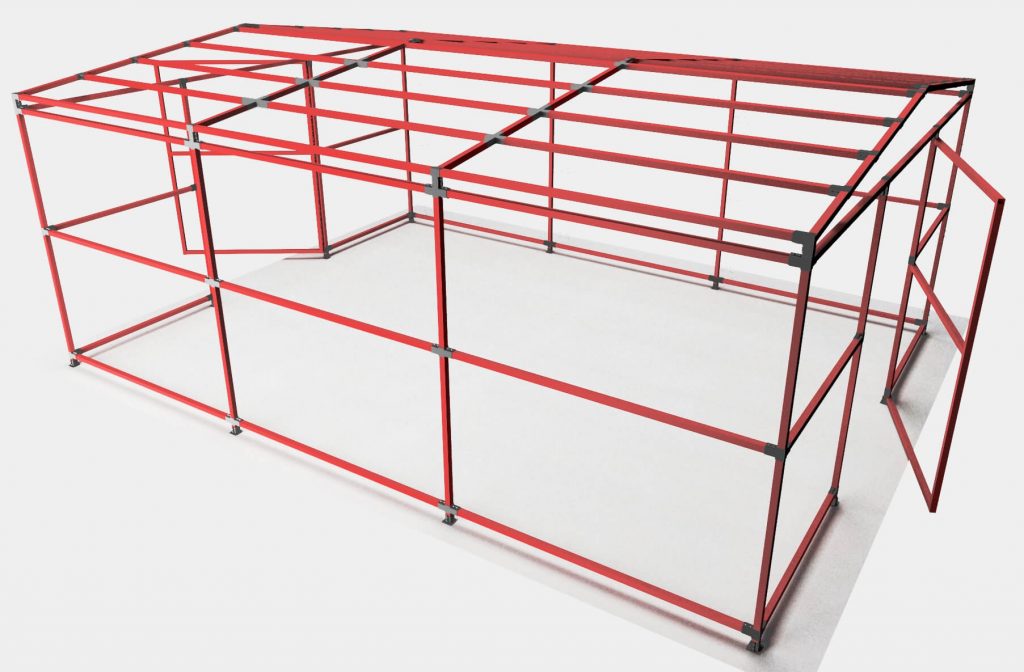
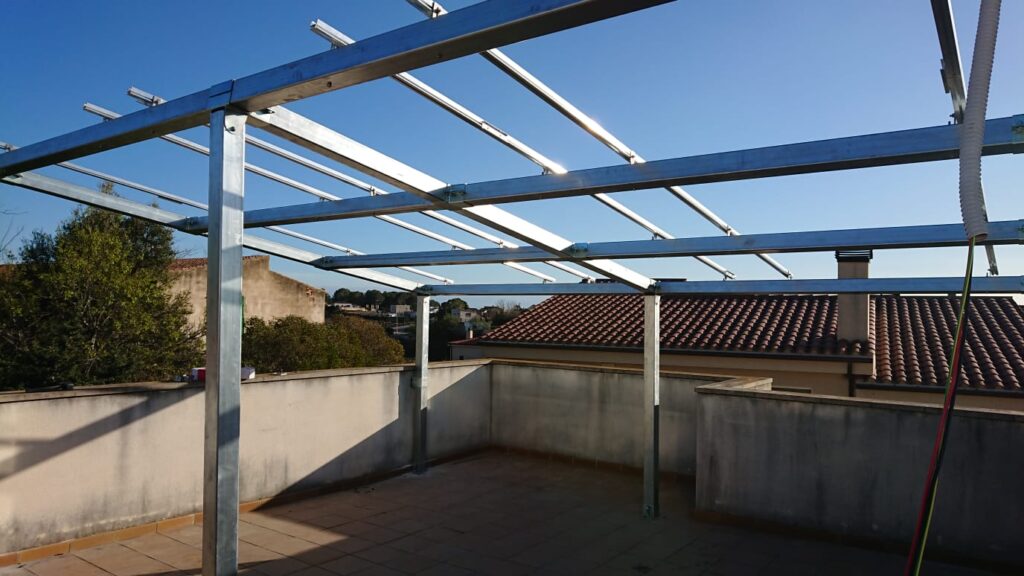
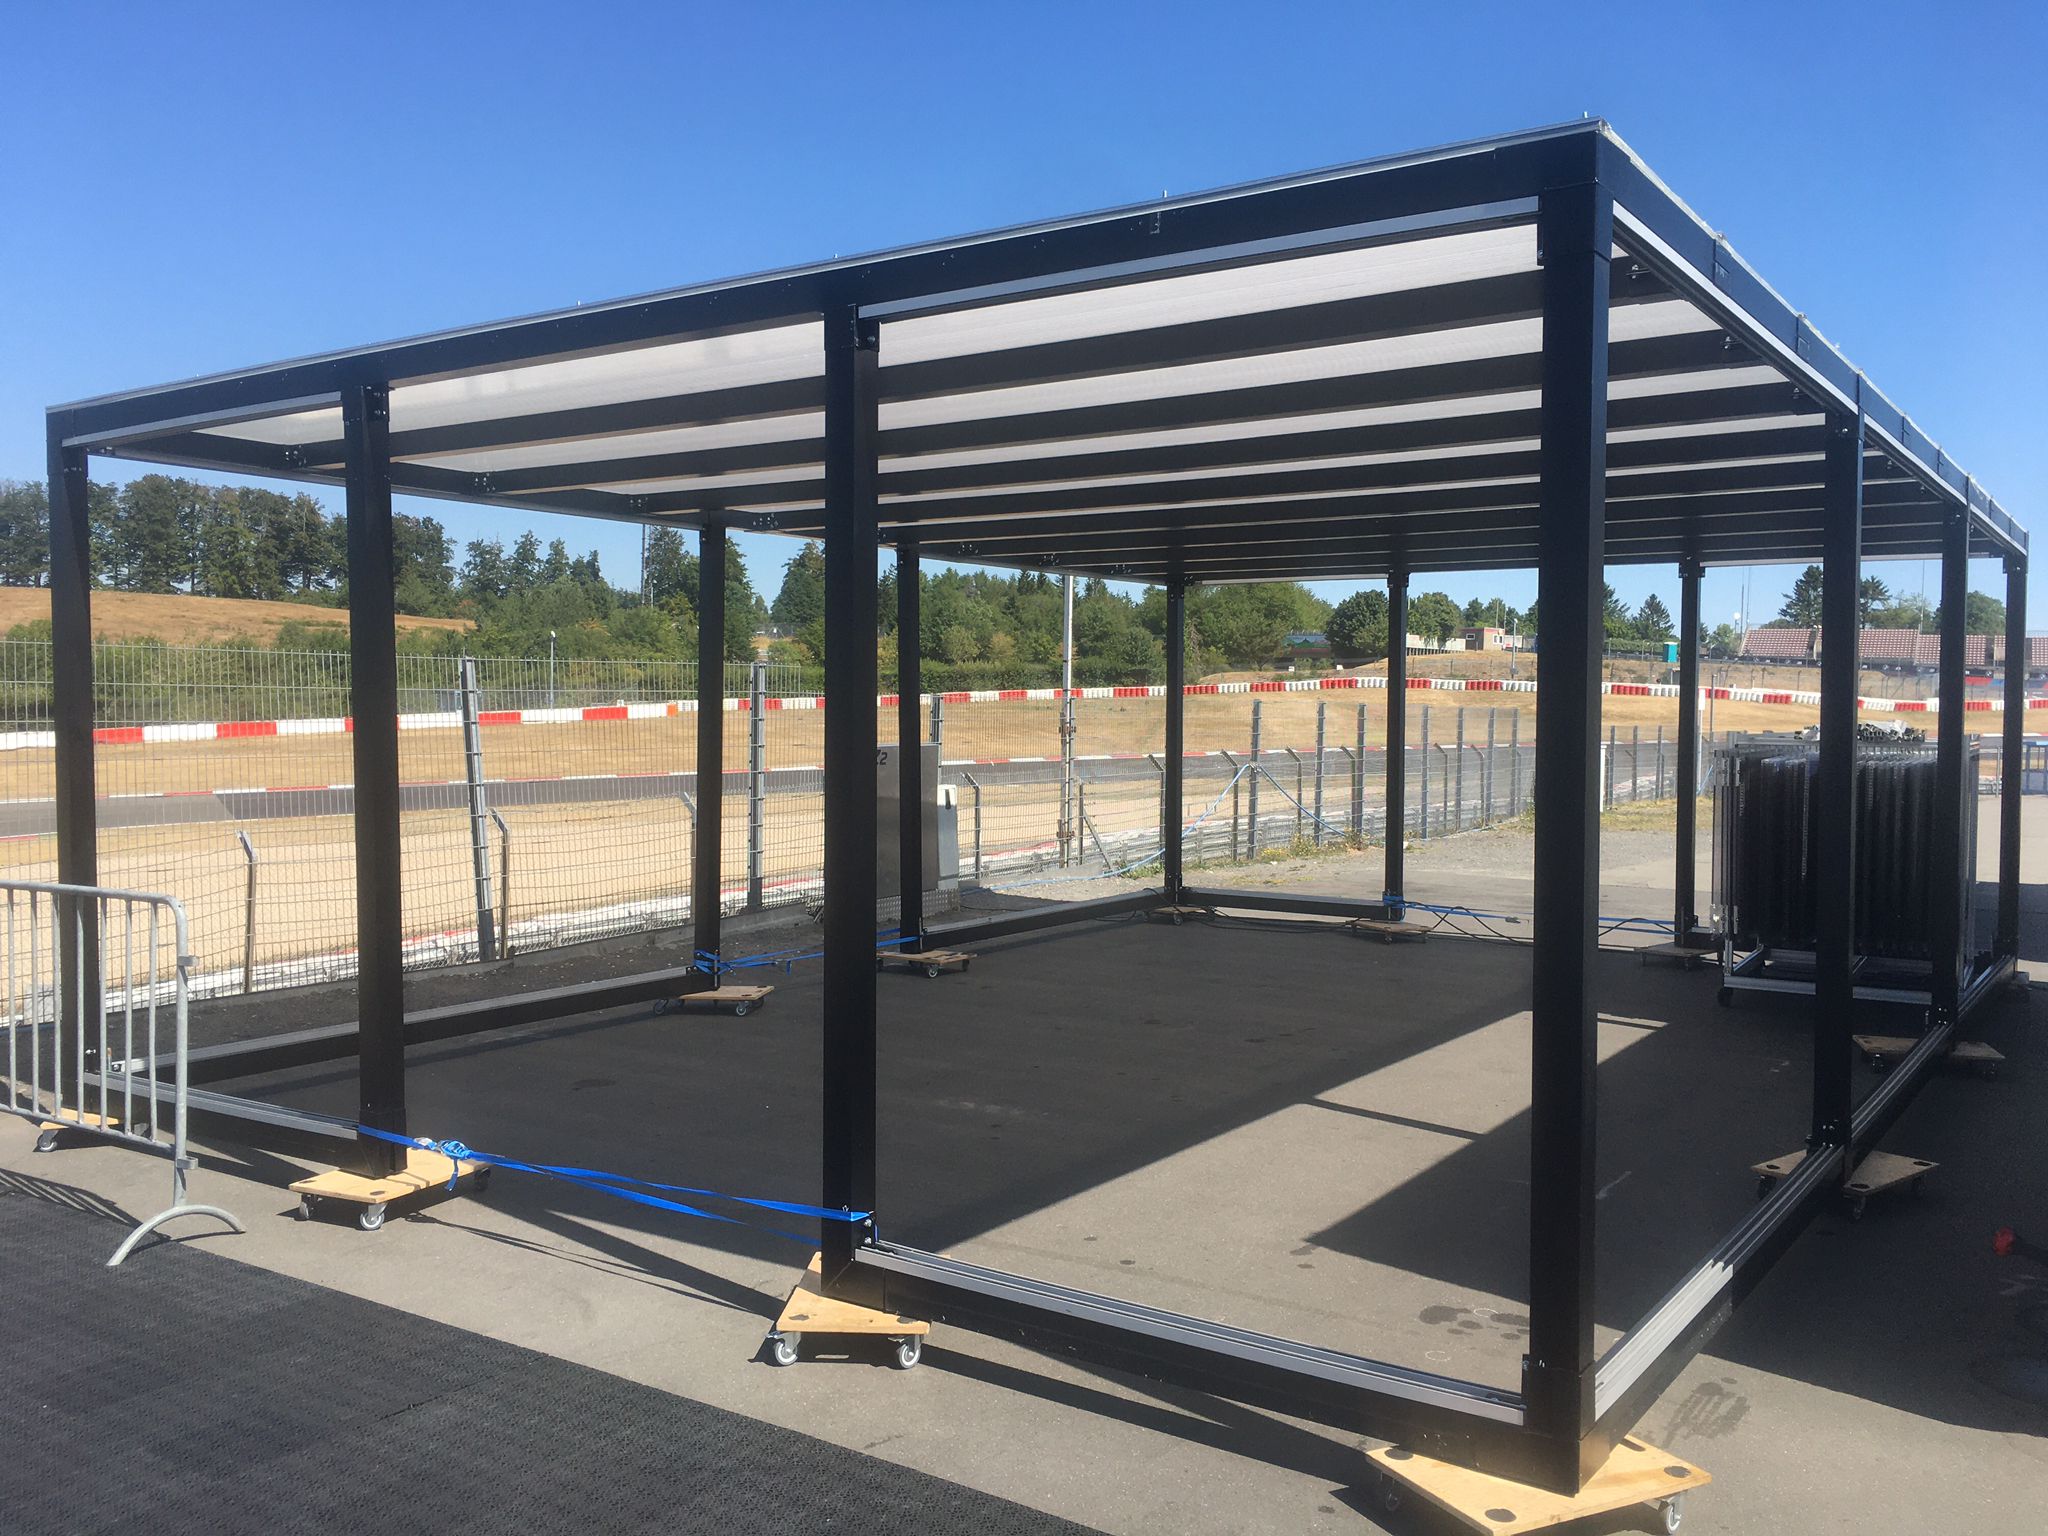
The StarModul system allows for the assembly of a metal structure using bolted joints, replacing welding at structural joints with mechanical connections designed to position and join the profiles.
The structure is prepared in accordance with the project documentation, facilitating the step-by-step assembly of columns, beams, frames, and other elements directly on-site.
ASSEMBLY PROCEDURE
Step-by-Step Guide to Assembling a Metal Structure
Assembly begins with proper layout, prior identification of the parts, and a logical sequence of assembly by levels. The system is assembled using basic hand tools in accordance with the project documentation.
01
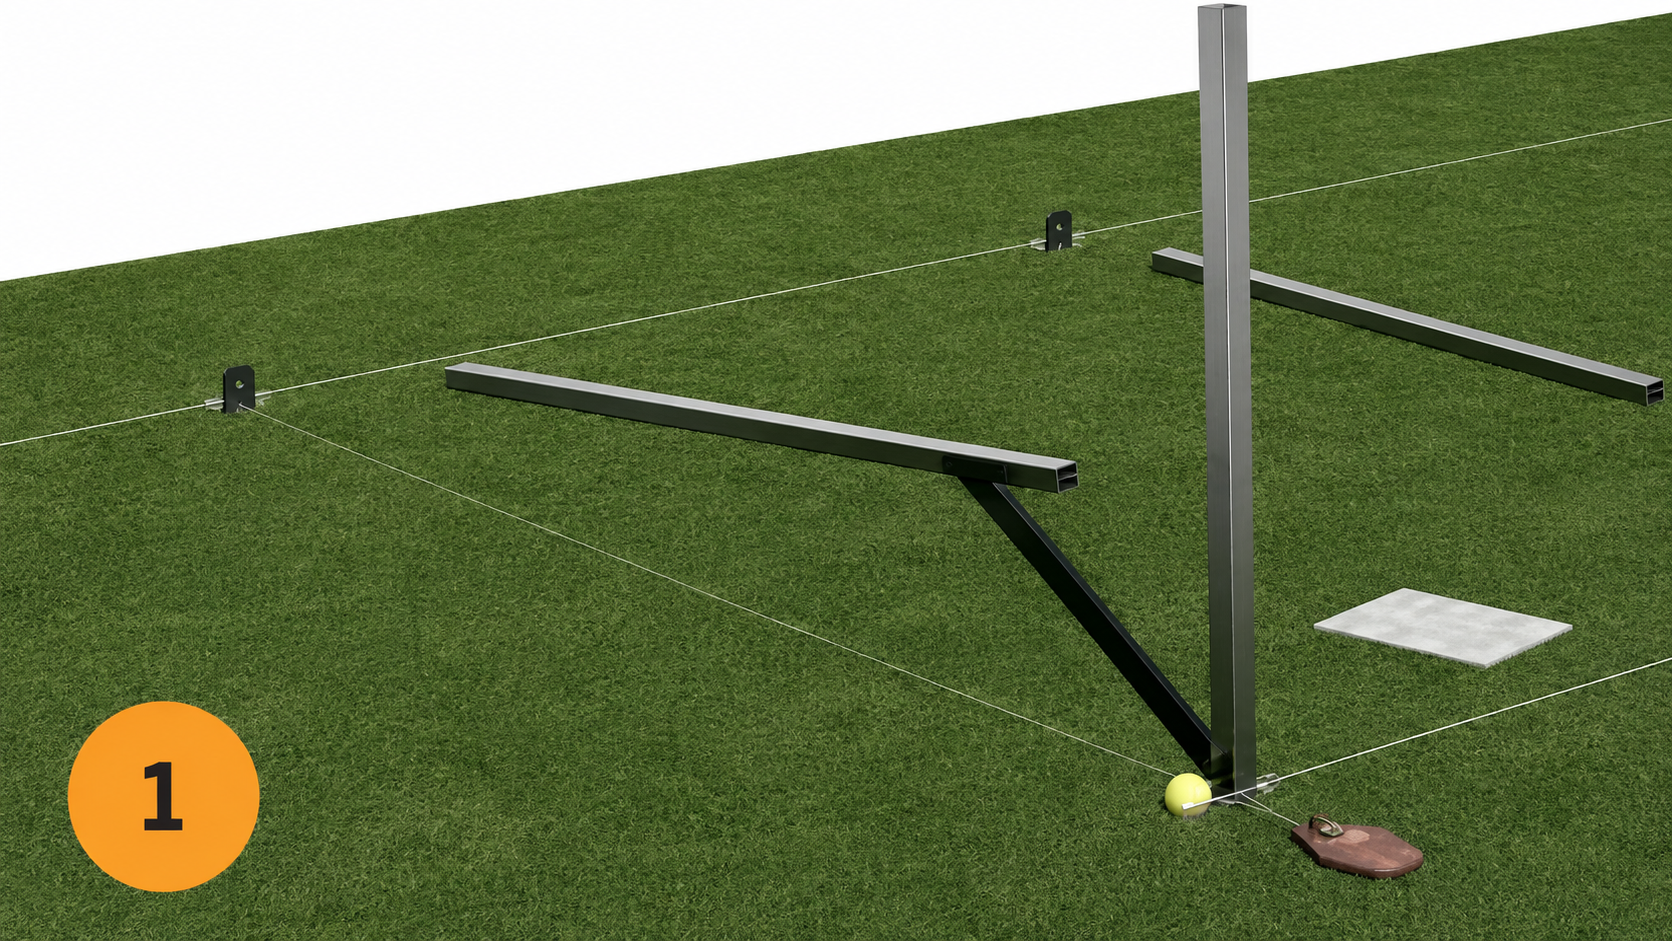
Layout and Pre-assembly of Columns
The structure’s position is determined, and the columns are pre-assembled on the anchor pieces provided for securing them to the ground.
02
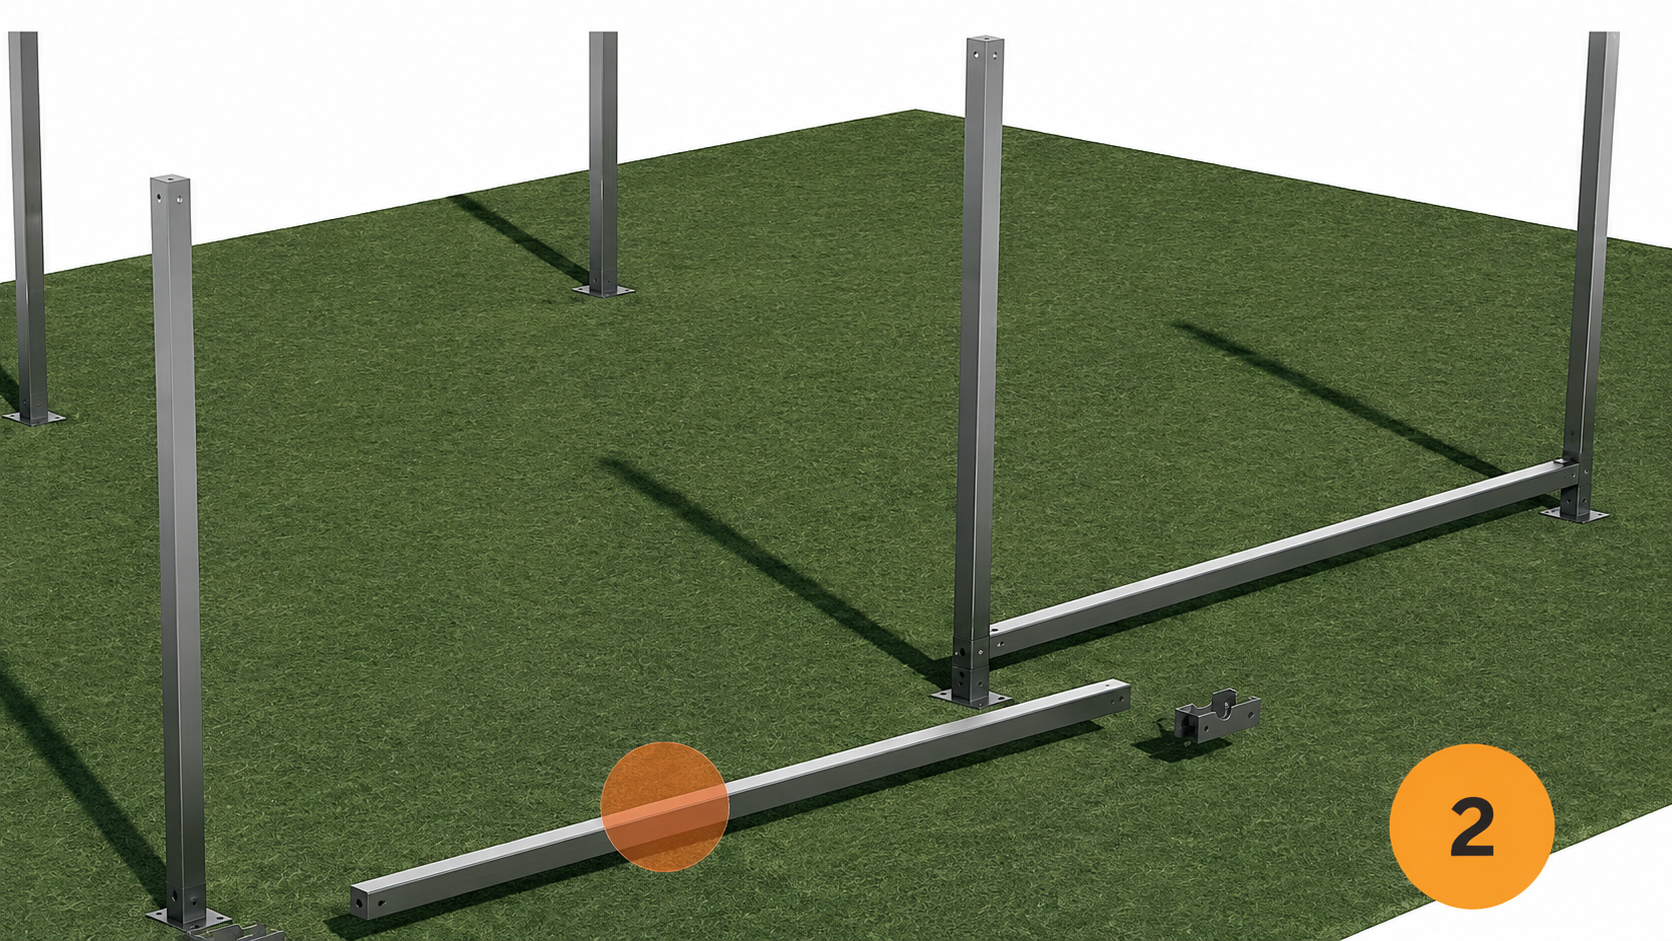
Installation of the Lower Perimeter Strap
The bottom profiles are connected to form the perimeter of the structure and to align the positions of the columns with one another.
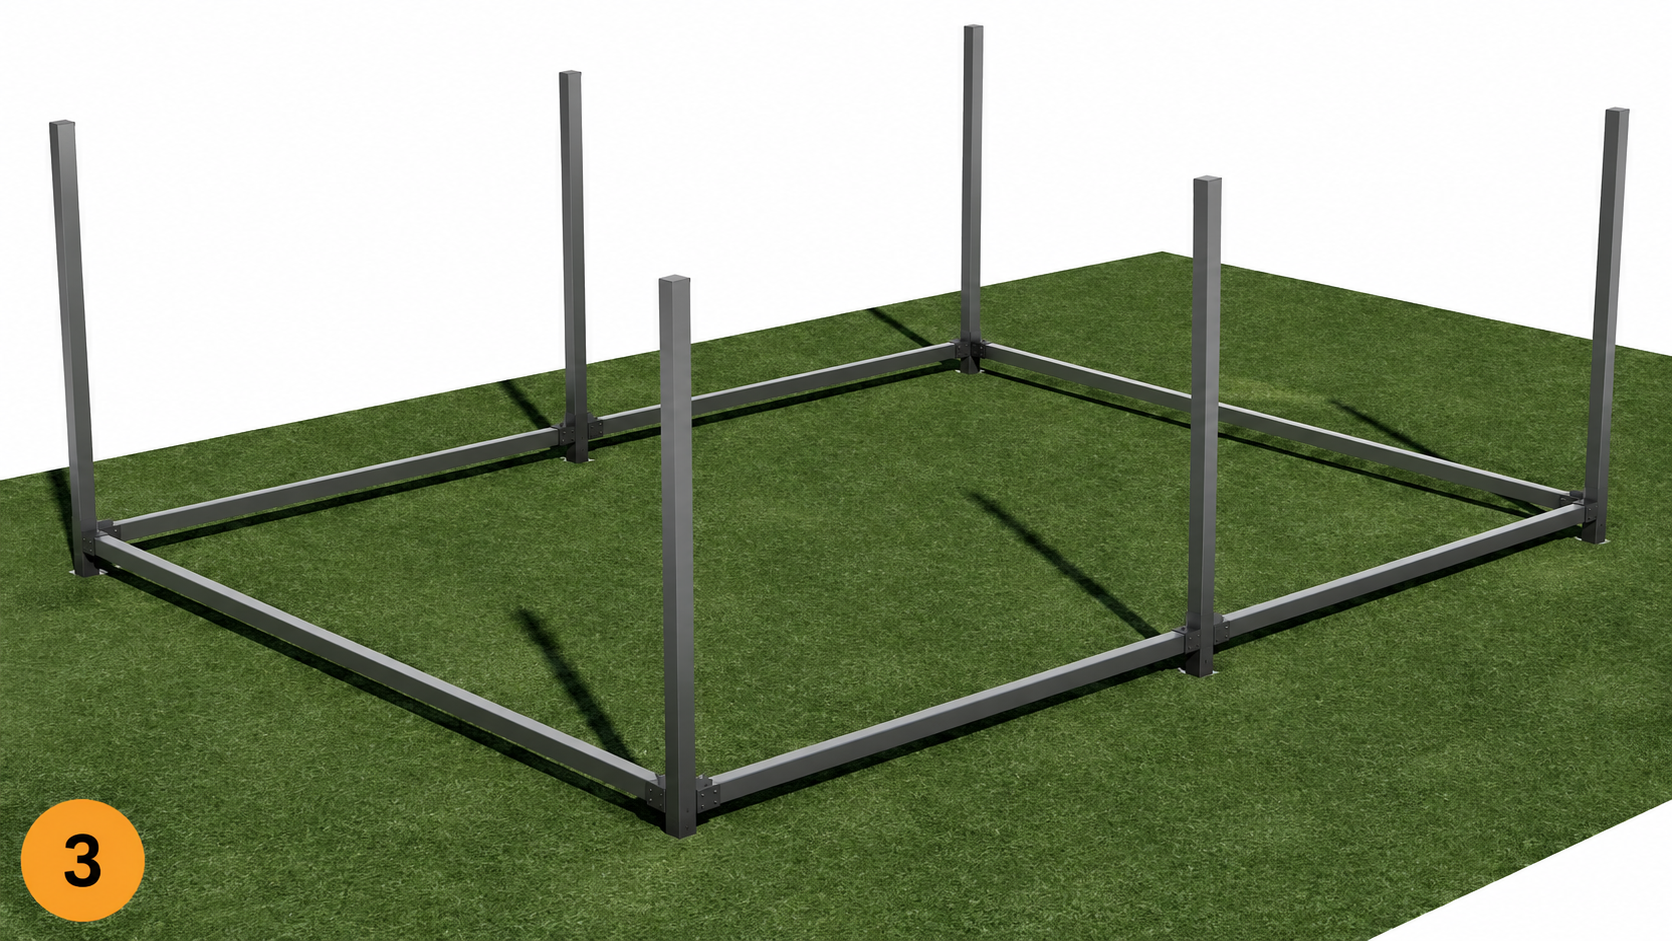
03
Checking the base and securing it to the floor
Once the lower perimeter is installed, a more rigid base is achieved. At this point, the structure can be secured to the floor using anchors or another system specified in the project.
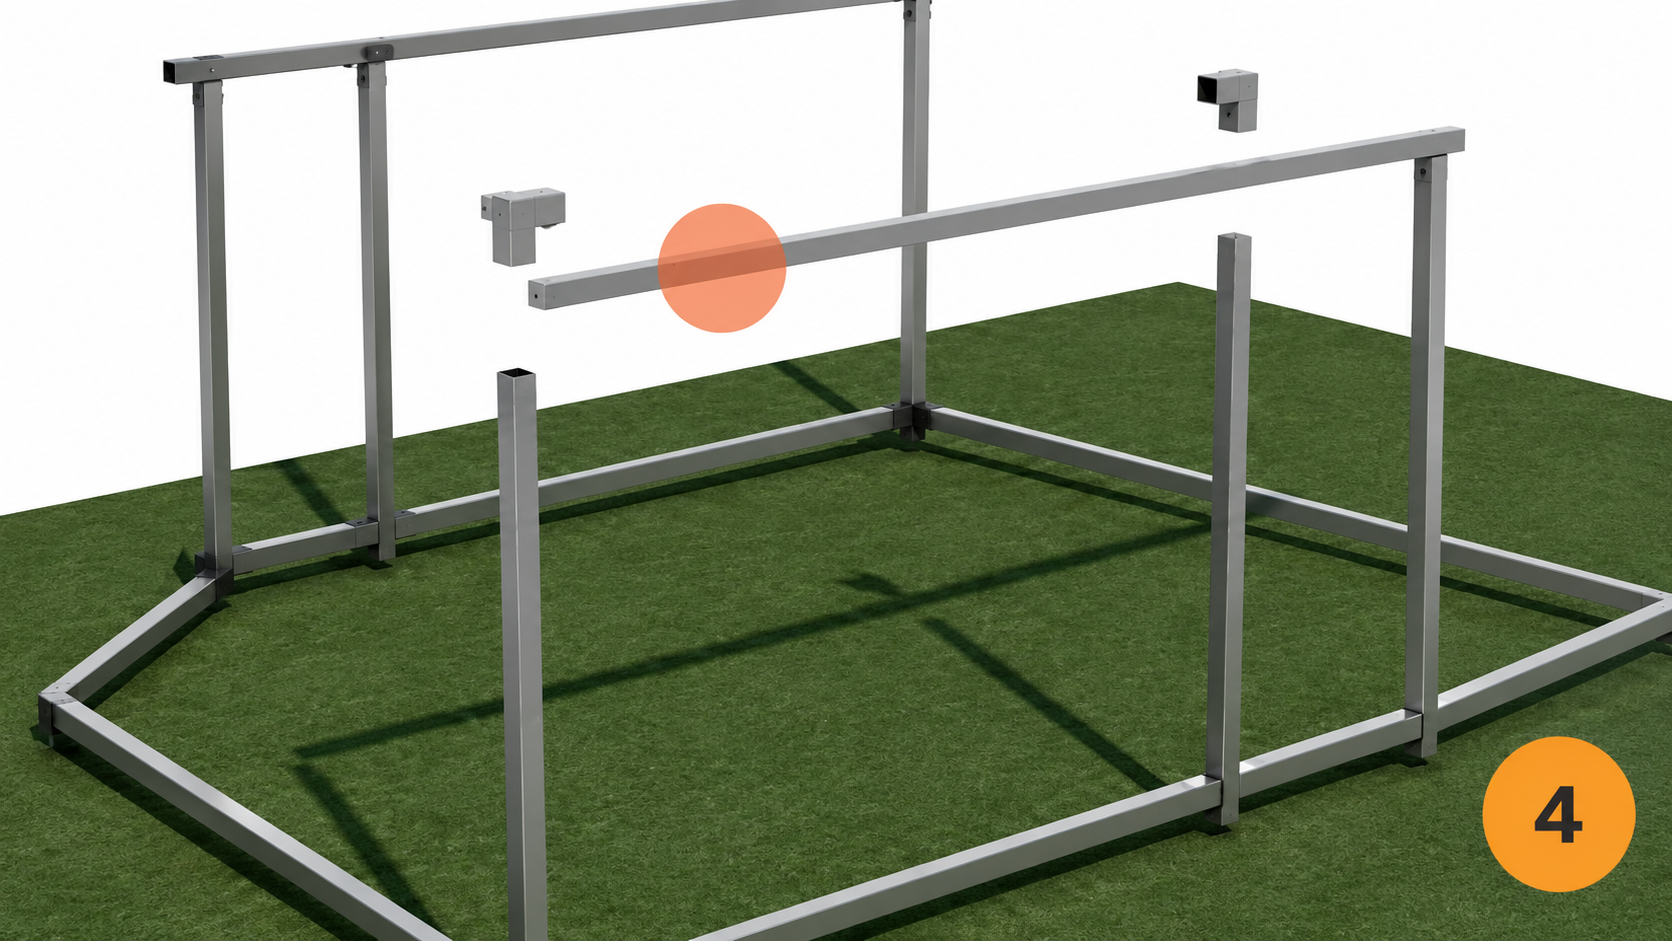
04
Installation of the Roof Perimeter
The upper profiles that form the perimeter of the roof and connect the tops of the columns are assembled.
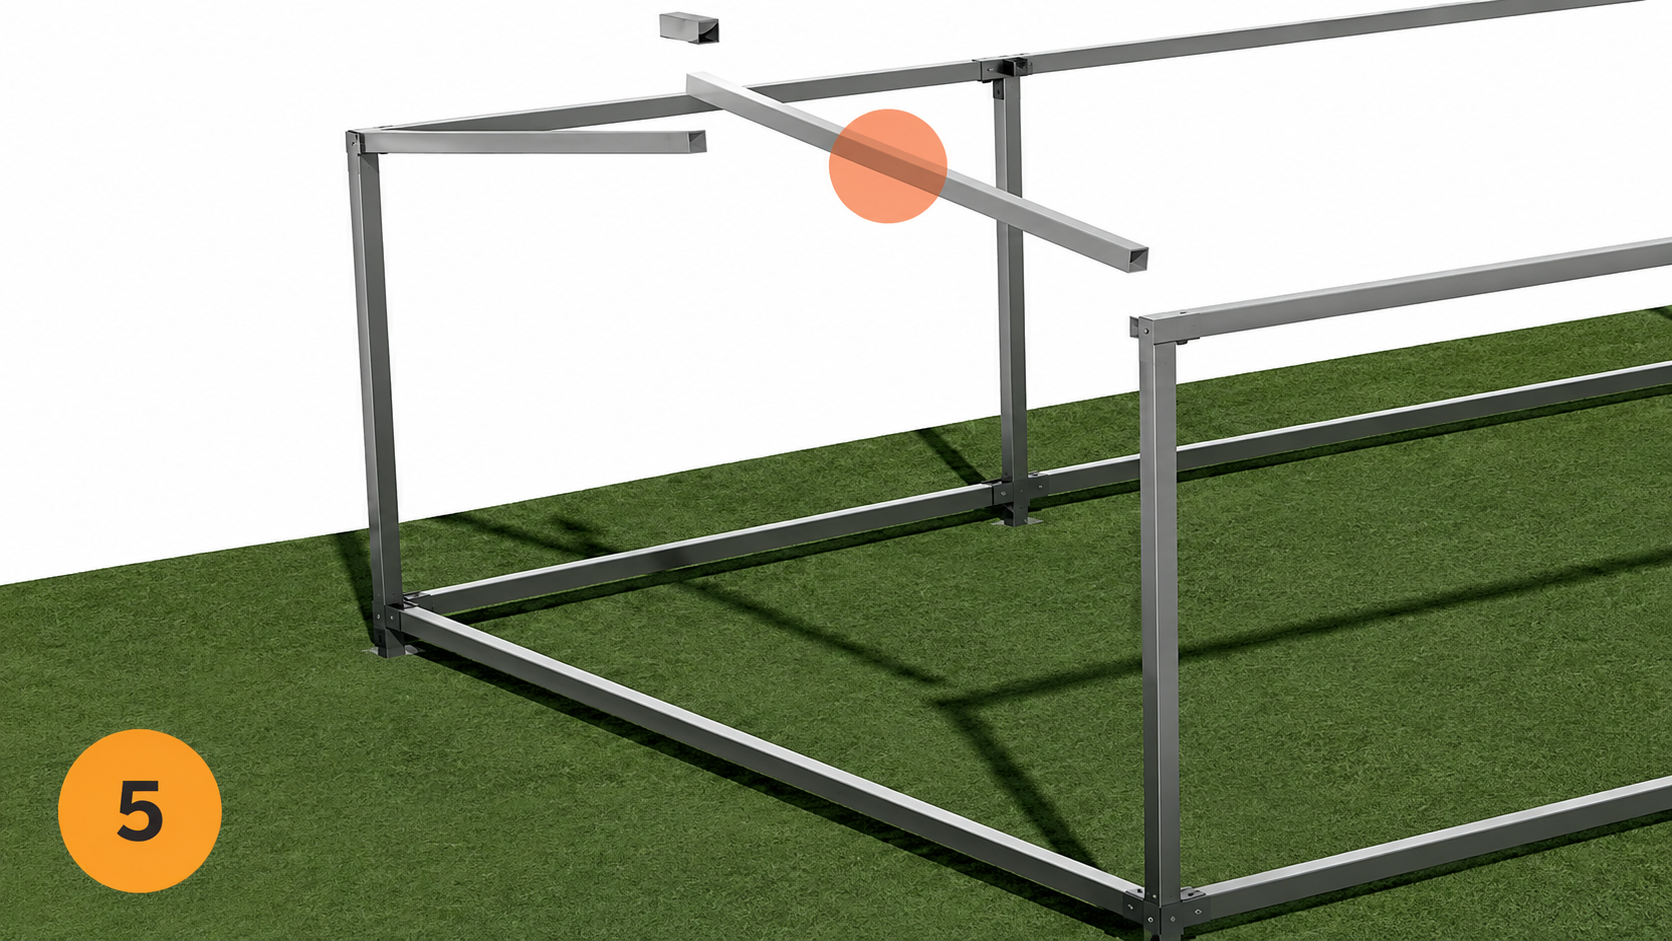
05
Forming Roof Slopes
When the geometry corresponds to a gable roof, the parts and profiles are assembled to create the intended slopes.
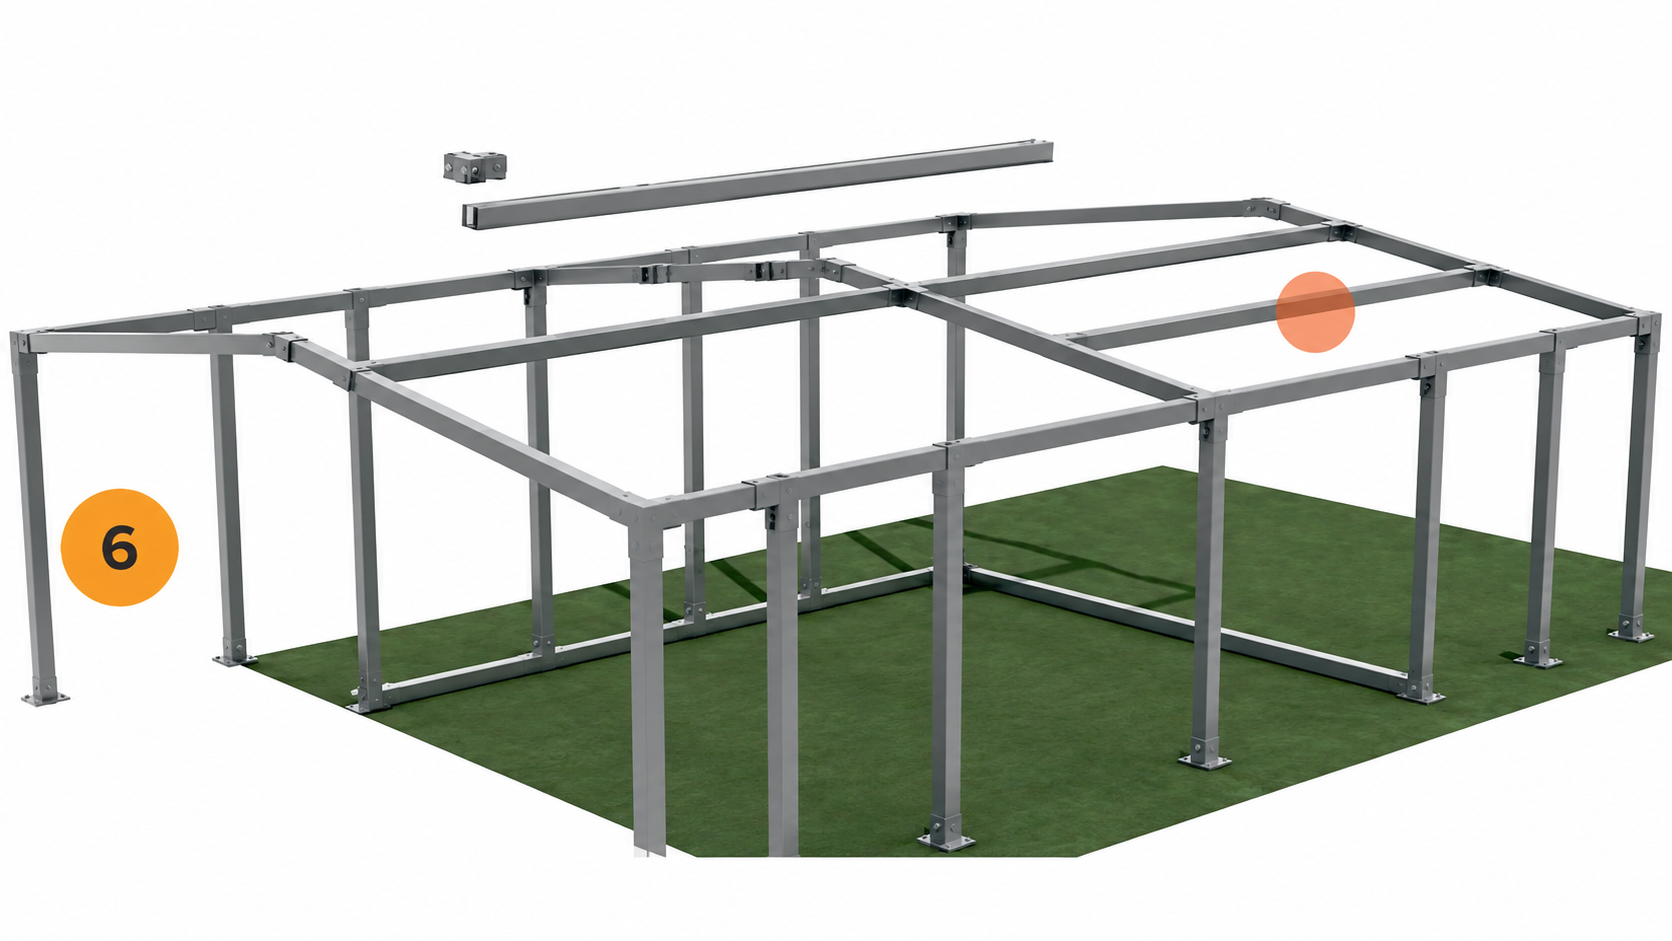
06
Installation of inter-gantry beams
The roof beams located between the frames are installed to complete the load-bearing structure of the upper level.
07
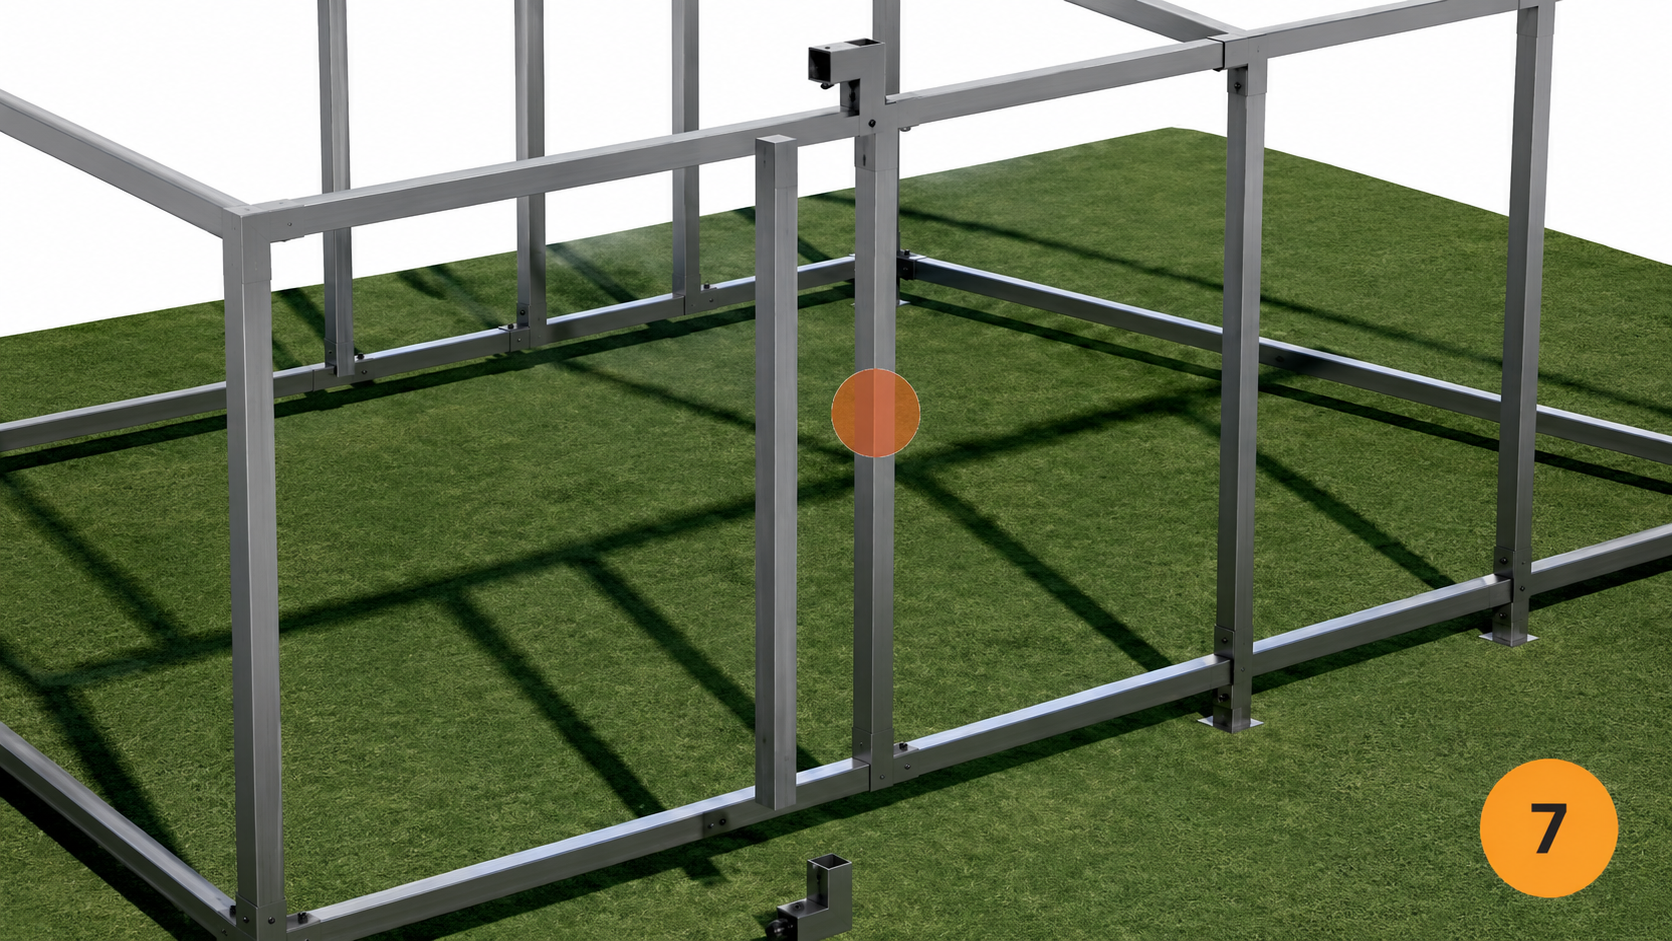
Door and Window Frames
The special components and profiles needed to form the openings and structural subframes for doors and windows are installed.
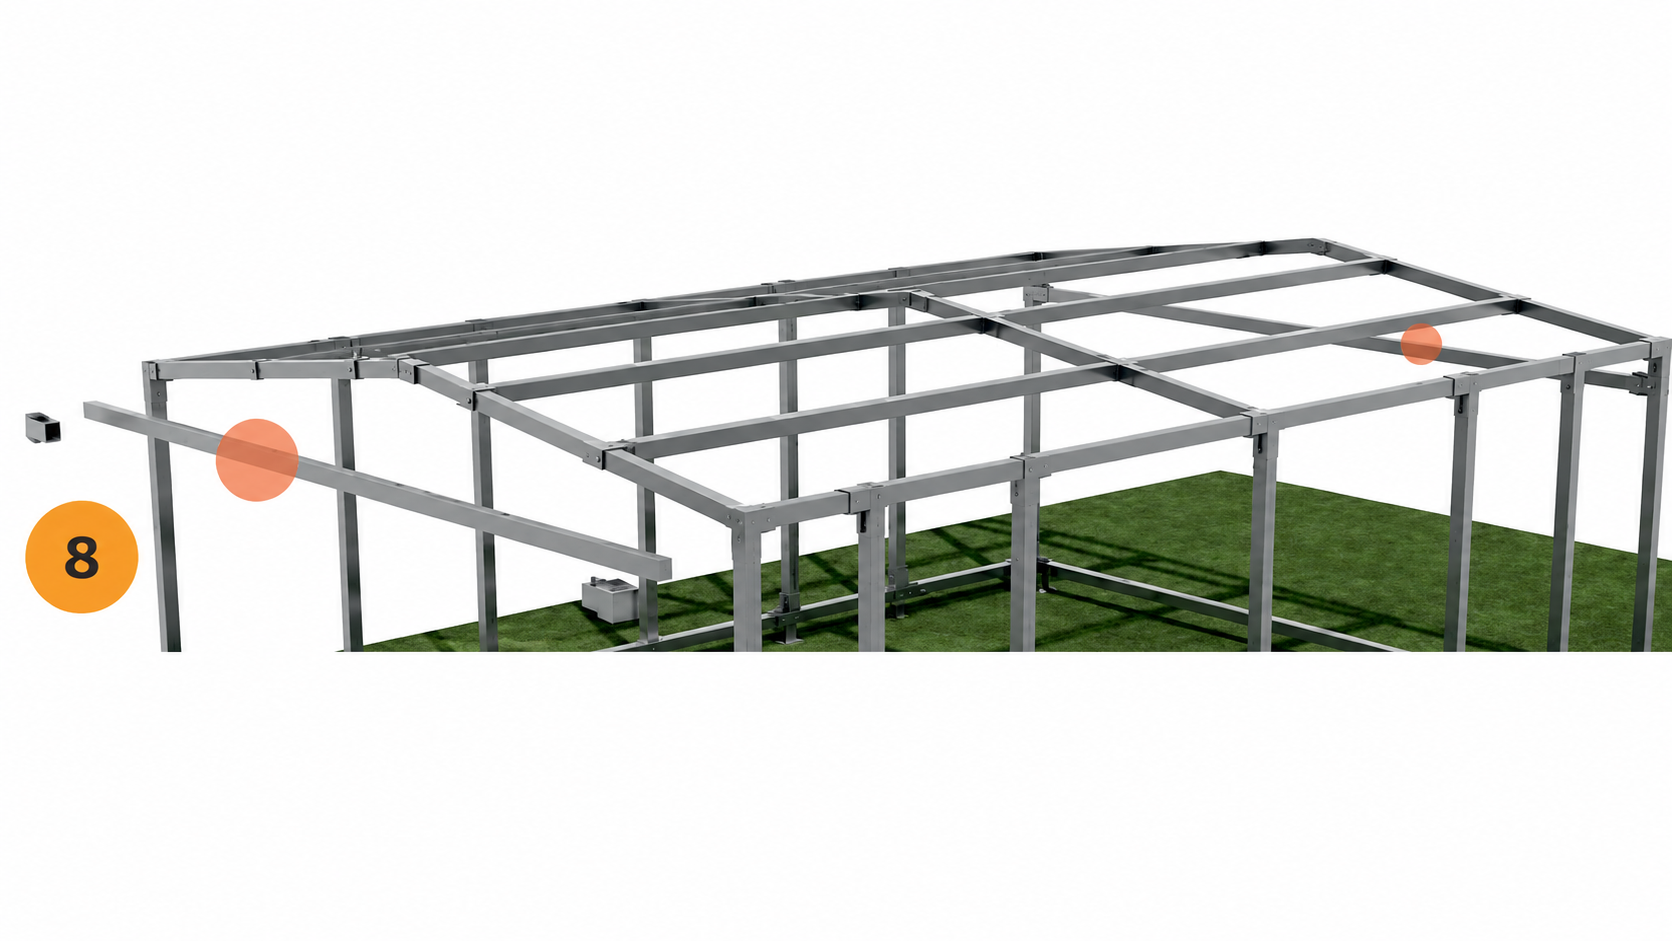
08
Stiffening of the structure
The stiffening elements specified in the vertical plane are installed to ensure the stability and geometry of the structure.
09
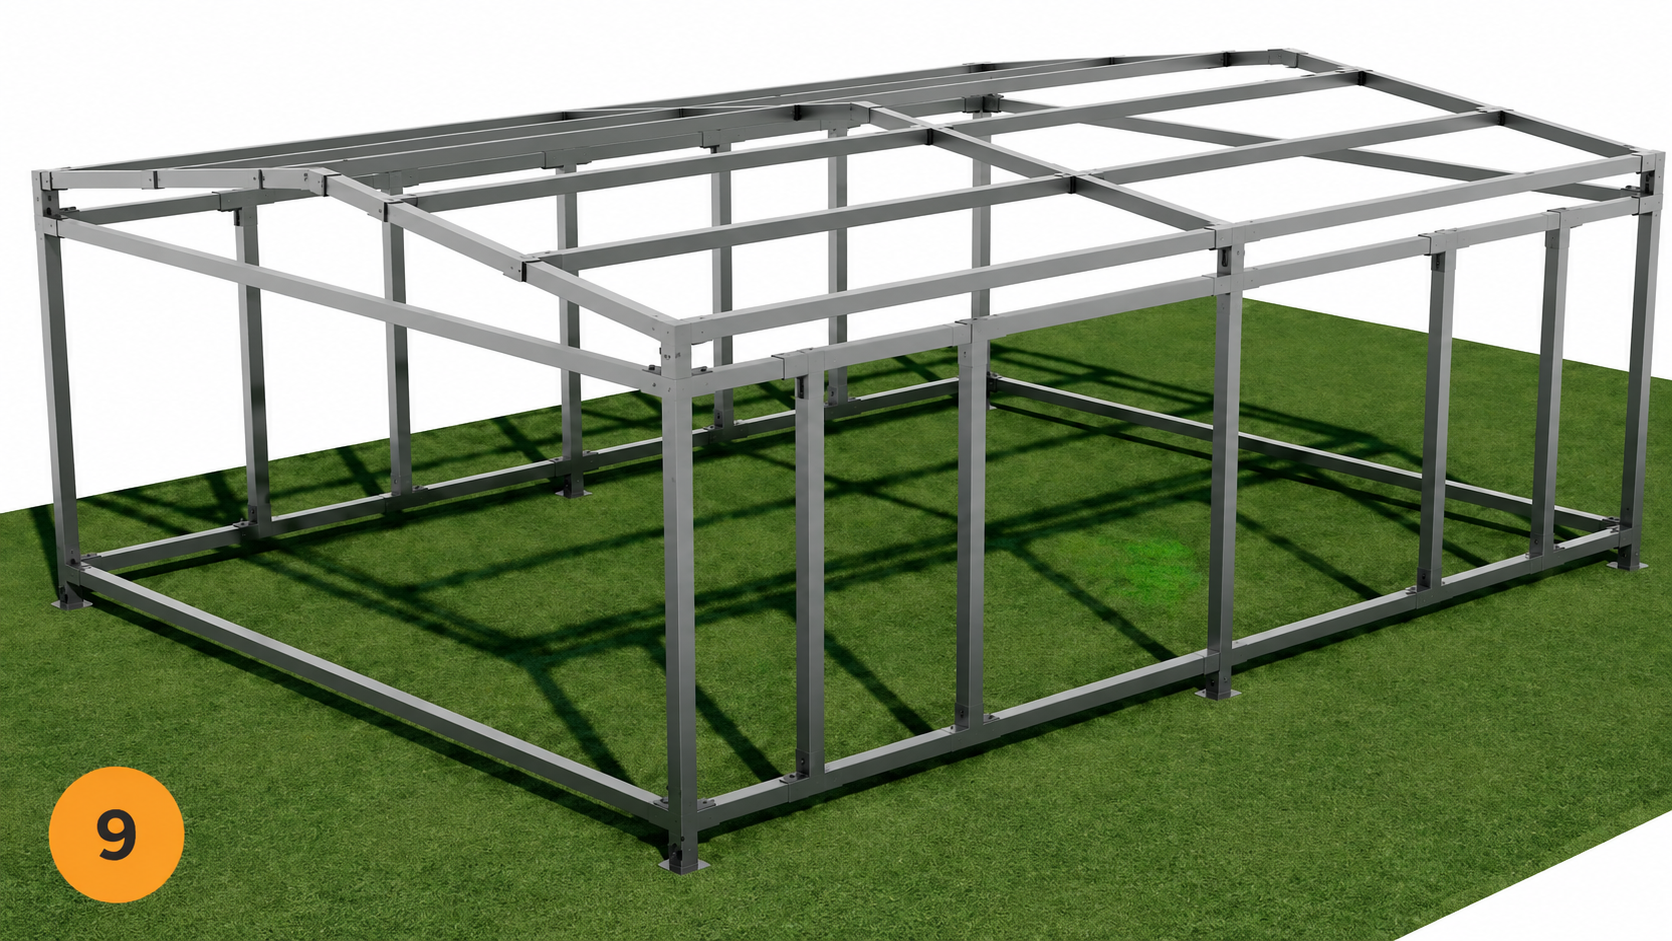
Completed structure and exterior walls
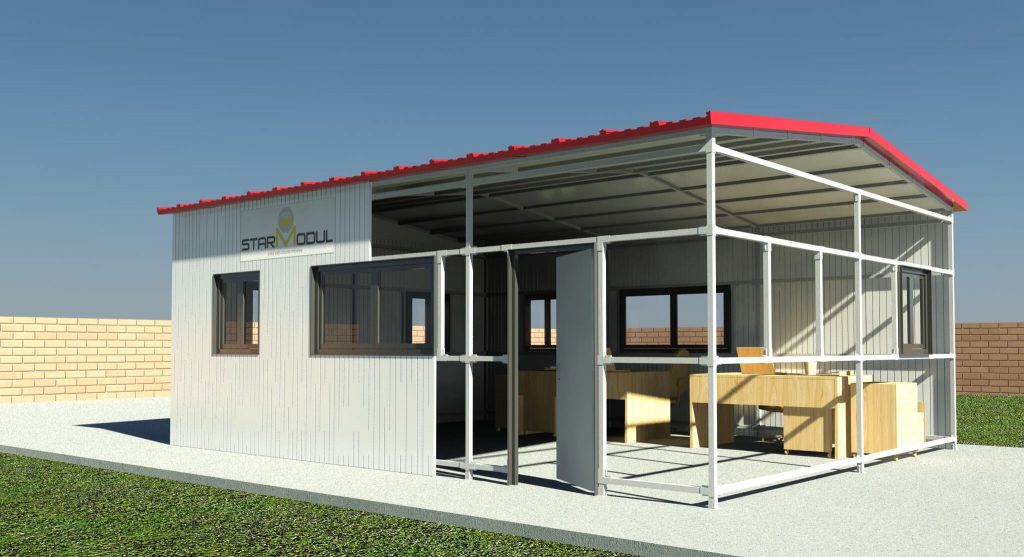
Once the structure is assembled, the enclosure can be completed in full or in part. The catalog lists sandwich panels as a solution when thermal and/or acoustic insulation is required.
Assembly sequence: The diagram above illustrates the procedure described in the StarModul catalog. The specific configuration of profiles, joints, fasteners, and stiffeners must conform to the documentation and structural calculations for each project.
ASSEMBLY VIDEO
Step-by-Step Guide to Assembling a Bolted Metal Structure
In this StarModul video, you can see the actual process of assembling a bolted metal structure, from preparing the components to putting the structure together.
The goal of the system is to implement a predefined process on-site, reducing the need for adjustments and eliminating the need for welding at joints that are connected using StarModul joints.
INSTALLATION COMPARISON
Traditional Assembly vs. StarModul Screw-Based Assembly
The main difference lies in how the joints between profiles are handled during the assembly of the metal structure.
Welded metal structure
- The profiles must be positioned and squared before welding.
- Installing the joint requires on-site welding work.
- Sparks are generated, and special equipment is required.
- Welding on certain finishes or materials requires appropriate procedures.
- The order of the set-up depends on the preparation and execution of each match.
Assembly with StarModul
- Connecting pieces help position the profiles at the joint.
- The joints are assembled using bolted connections.
- No welding is performed on the joints secured using this system.
- Assembly can be organized using drawings and component identification.
- Connections make it possible to analyze disassembly or modifications when the calculations allow it.
ON-SITE INSTALLATION
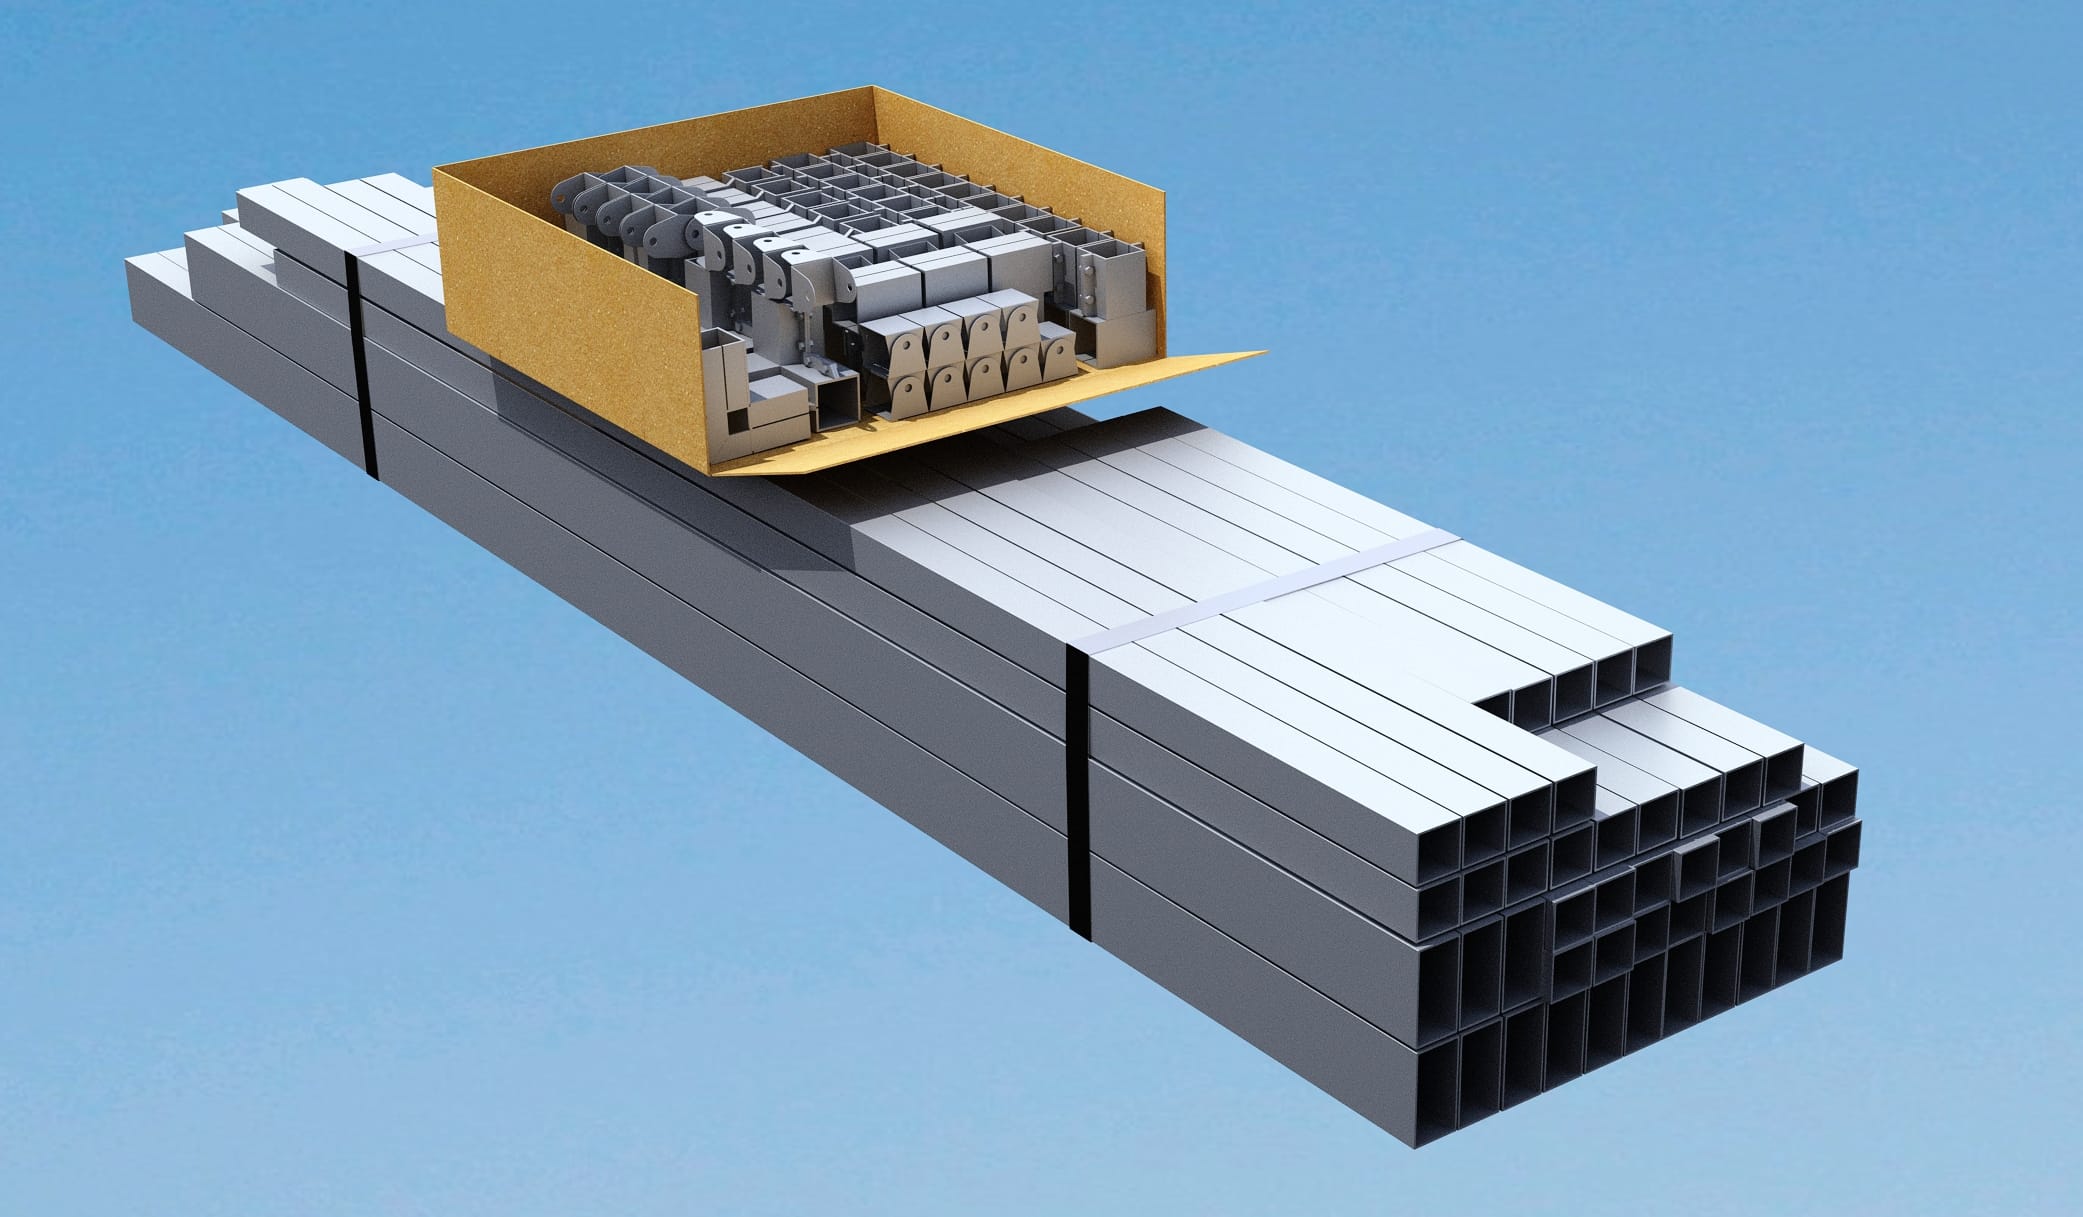
Materials prepared to facilitate the assembly of the metal structure
For projects supplied as kits, the components can be prepared and organized so that assembly follows a defined sequence. The assembly documentation identifies profiles, joints, and positions.
- Structural profiles as specified in the project.
- StarModul connectors for each type of knot.
- Screws and fasteners provided for the system.
- Drawings and component identification for assembly.
- Structural verification and calculations based on the project specifications.
FREQUENTLY ASKED QUESTIONS
Questions About the Assembly of Metal Structures
We answer the most common questions about assembly, tools, DIY assembly, and StarModul bolted metal structures.
The assembly of a StarModul steel structure involves joining the steel profiles using bolted connectors in accordance with the project’s geometry and documentation. The joints created using this system do not require welding during assembly.
Not in joints designed with StarModul connectors. The profiles are mechanically connected using the connectors and the corresponding fasteners.
The connections are tightened using conventional tools suitable for the system’s fasteners. In addition, during assembly, the standard methods of layout, leveling, lifting, and safety measures required based on the structure’s dimensions are used.
Yes. StarModul offers kits and ready-to-assemble solutions, with profiles, connectors, and documentation organized according to the project’s configuration.
It depends on the size, weight of the components, height, and complexity of the structure. Small projects may require smaller teams, while larger structures need more workers and the corresponding support equipment.
The time required depends on the dimensions, geometry, accessibility, and site conditions. The bolted system is designed to simplify assembly and reduce welding and adjustment work at the joints.
The use of bolted connections makes it easier to disassemble components and allows for the consideration of future modifications or expansions. Any changes must first be verified through structural analysis.